Sink Linear Drain Pan- Black ABS for Slot Drains
Ships from Oregon (Click for average Ground delivery map
 )
)
Sink Linear Drain Pan- Black ABS for Slot Drains
- Drain Pans for use with any slot drain style sink.
- Suitable for all types of sinks- Concrete, Stone, Corian, etc.
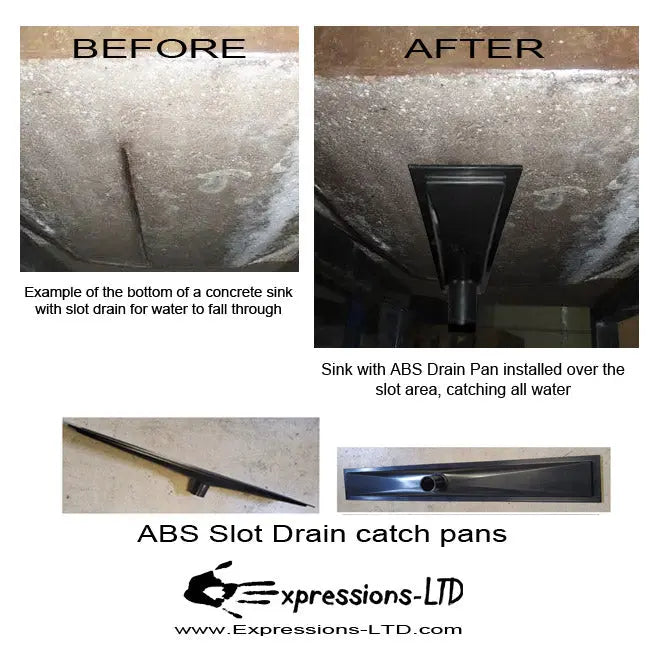
- Essentially a water trough for a sink which works simply by catching the water from various sizes of non-traditional drains. Drain Pan attaches to the under side of the sink with silicone, catches the water that falls through the sink slot-drain, and drains into standard plumbing connections.
- Made of industrial grade black ABS plastic, @1/8" thick.
- Sloped toward the center to assist water to flow to the drain.
- Drain Pan has a small flange lip to provide a surface to silicone for a water-tight seal. Flange can be easily trimmed or sanded down if a smaller overall size is needed.
- We also make Stainless Steel Drain Pans (Sold Here)
- Need an in-between pan size? CUSTOM ABS PANS (Sold Here). If you want to customize your own, please scroll down and watch our video showing how you can modify these pans.
Specifications - ABS Drain Pan
- Download: TDS (Technical Data Sheet)
- PLEASE NOTE- We have revised this product for 2023, and the new design now has slight dimension changes from our old style. We now name each pan size based on their overall Outside Length Dimension. Please review below to confirm sizes and lengths. The new style has a formed 1.5" tube drain pipe already on the pan, for a more seamless leak-proof plumbing connection.
- Dimensions (NEW DESIGN- 5/8" Mounting Flange Width):
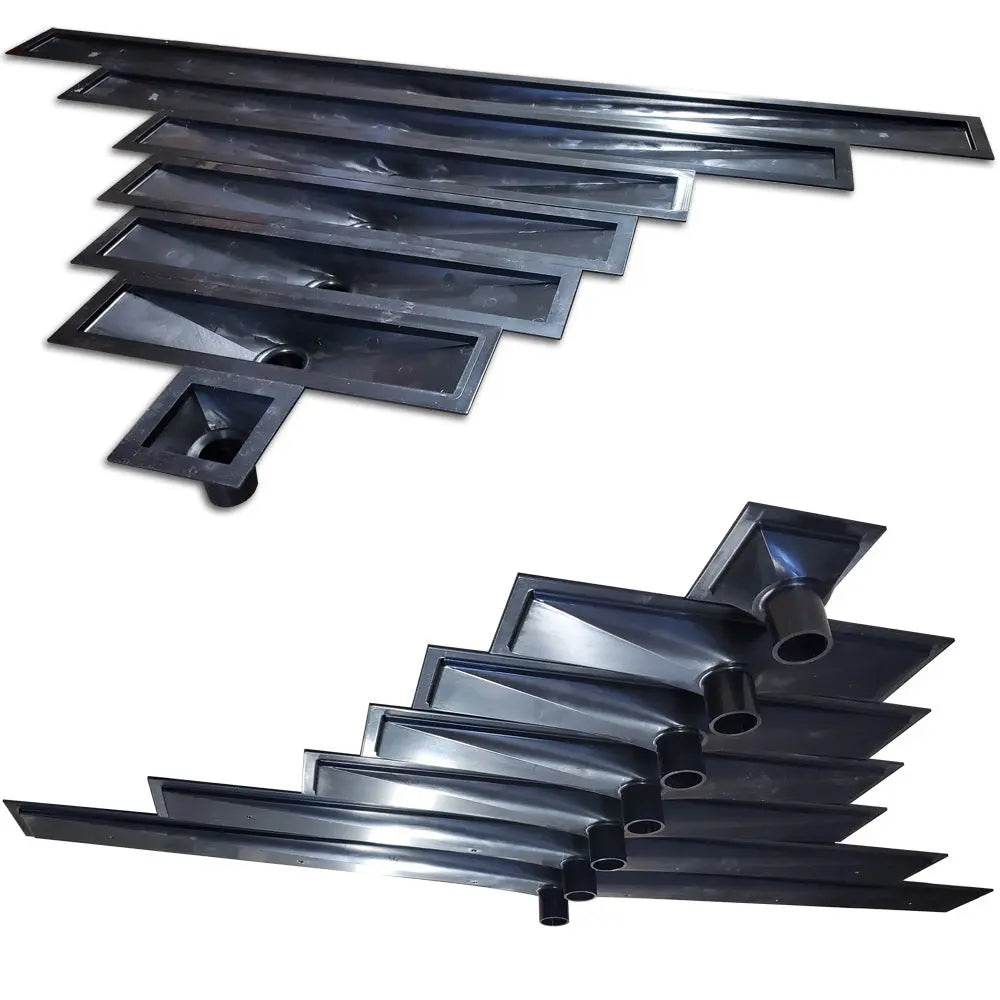
- 4" PAN: Outer: 4"L x 3.75"W Inner: 2.75"L x 2.5"W
- 14" PAN: Outer: 14"L x 3.75"W Inner: 12.75"L x 2.5"W
- 18" PAN: Outer: 18"L x 3.75"W Inner: 16.75"L x 2.5"W
- 21" PAN: Outer: 21"L x 3.75"W Inner: 19.75"L x 2.5"W
- 25" PAN: Outer: 25"L x 3.75"W Inner: 23.75"L x 2.5"W
- 37" PAN: Outer: 37"L x 3.75"W Inner: 35.75"L x 2.5"W
-
49" PAN: Outer: 49"L x 3.75"W Inner: 47.75"L x 2.5"W
- Note for the small 3" size pans: Great as a universal catch size, which can be used with any normal bathroom sized sink where a normal round drain isn't desired. Example- creating a custom mini slot, or unusual shape drain, or having an old drain piece that no longer functions properly but can't be replaced, and so using the small pan under the sink enables collecting all water still and connecting to plumbing properly.
Please Note: We have had a few requests recently for UL Certification on the Drain Pans. We are working with Underwriter Laboratories to come up with a testing process and some form of approval, but it may be some time until we have this process completed. In the meantime, if a building inspector will be required to approve the plumbing this Drain Pan is used in conjunction with, you may need to reach out to your local building department and see what they want for it to pass inspection. In most cases, the inspectors have just wanted to visually inspect the pan and see the quality, and water-tight construction, and have then passed them off, or they will ask that the plumber/installer write a simple guarantee for a couple of years, stating they will repair/replace in the event there is a leak with the drain pan.
Installation Instructions:
- When a sink is fabricated, they should be made with a flat area on the bottom of the sink so the drain pan can mount to a flat surface. The flat area around the 'slot' for water to come though should be equal to, or larger, than the dimensions for the outside measurements of the Drain Pan. Silicone is generally all that is needed to attach the Drain Pan to the bottom of the sink.
- If necessary, secure the drain pan to the sink using screws or strapping.
- Place the drain pan against the sink bottom, position to where it needs to be to catch the water, mark the holes using a sharp pencil, drill out the holes using a masonry drill bit (A hammer drill is recommended for concrete), silicone the lip of the drain pan, place onto the sink, and secure using appropriate screws.
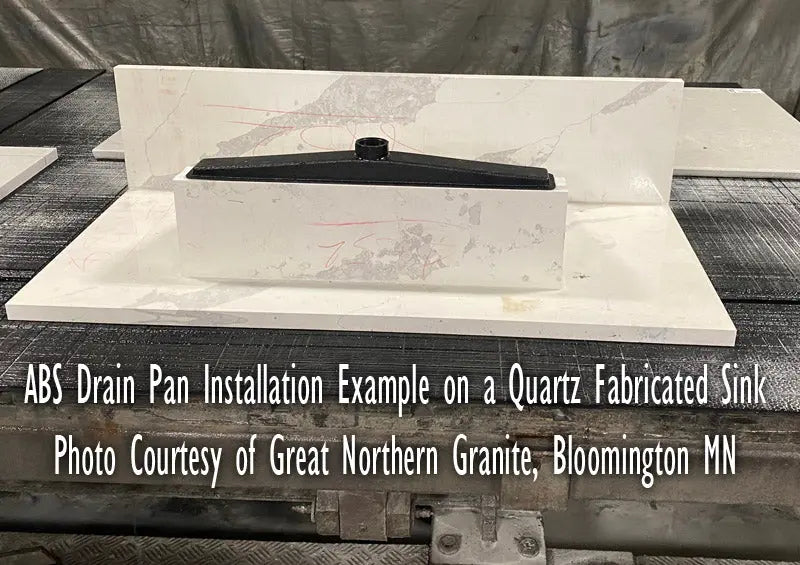
- Please note that if the plastic Drain Pan has a slight curve to it, you may need to push up on the drain pan in a few spots, if installing the Drain Pan after the sink is installed in its place, using a few blocks of wood for example. Once the silicone dries, it will hold the Drain Pan in place without a curve or twist to it. If installing the Drain Pan to a sink that is upside down (on a fabrication table for example) then you can simply place a few weights on the Drain Pan to hold it true while the silicone dries.
Cleaning Care for Slot Drain Pans:
- Once installed, the area of the Drain Pan should be periodically flushed with hot water and bleach, usually 10:1 is sufficient (10 parts water, 1 part bleach). Let the bleach 'flush' sit for about 10 minutes, and then flush again with clean hot water. This will keep the Drain Pan area clean and free of mildew.
- An alternative to bleach is to use straight hydrogen peroxide (3% solution). Pour hydrogen peroxide into the Drain Pan, trying to get the solution into all areas of the Drain Pan. Allow to sit 10 minutes, and then flush with hot water.
Customize Length of Sink Linear Drain Pan- Black ABS for Slot Drains
- If you want to resize on your own: These pans are ABS plastic and easy for you to customize. Start with a pan larger than what you need, and the ends can be cut off (hacksaw or miter/chop saw). Cut off just the very end first, and save so you can glue it back on. Then cut the pan to the length you want. Temporarily tape on the end pieces back to the pan, and then use ABS glue to seal off each end. (ABS Glue like this, sold on Amazon: https://amzn.to/2WkzxSG). This glue will weld the plastic, making it watertight and very strong. Here is a video showing the process (Drain pans shown in this video are our old design- current design looks slightly different but the process is the same to customize their length):


